These are the ramblings of Matthijs Kooijman, concerning the software he hacks on, hobbies he has and occasionally his personal life.
Most content on this site is licensed under the WTFPL, version 2 (details).
Questions? Praise? Blame? Feel free to contact me.
My old blog (pre-2006) is also still available.
See also my Mastodon page.
| Sun | Mon | Tue | Wed | Thu | Fri | Sat |
|---|---|---|---|---|---|---|
| 1 | 2 | 3 | 4 | 5 | 6 | 7 |
| 8 | 9 | 10 | 11 | 12 | 13 | 14 |
| 15 | 16 | 17 | 18 | 19 | 20 | 21 |
| 22 | 23 | 24 | 25 | 26 | 27 | 28 |
(...), Arduino, AVR, BaRef, Blosxom, Book, Busy, C++, Charity, Debian, Electronics, Examination, Firefox, Flash, Framework, FreeBSD, Gnome, Hardware, Inter-Actief, IRC, JTAG, LARP, Layout, Linux, Madness, Mail, Math, MS-1013, Mutt, Nerd, Notebook, Optimization, Personal, Plugins, Protocol, QEMU, Random, Rant, Repair, S270, Sailing, Samba, Sanquin, Script, Sleep, Software, SSH, Study, Supermicro, Symbols, Tika, Travel, Trivia, USB, Windows, Work, X201, Xanthe, XBee
 &
&
(With plugins: config, extensionless, hide, tagging, Markdown, macros, breadcrumbs, calendar, directorybrowse, entries_index, feedback, flavourdir, include, interpolate_fancy, listplugins, menu, pagetype, preview, seemore, storynum, storytitle, writeback_recent, moreentries)
Valid XHTML 1.0 Strict & CSS

For a customer, I've been looking at RS-485 and MODBUS, two related protocols for transmitting data over longer distances, and the various Arduino libraries that exist to work with them.
They have been working on a project consisting of multiple Arduino boards that have to talk to each other to synchronize their state. Until now, they have been using I²C, but found that this protocol is quite susceptible to noise when used over longer distances (1-2m here). Combined with some limitations in the AVR hardware and a lack of error handling in the Arduino library that can cause the software to lock up in the face of noise (see also this issue report), makes I²C a bad choice in such environments.
So, I needed something more reliable. This should be a solved problem, right?
XBee modules are a range of wireless modules built by Digi, and are typically used to add wireless connectivity to Arduino or other microcontroller based projects. To configure these modules and update their firmware, you can use the XCTU configuration utility. This utility uses a serial port to talk to the XBee module, so you will need some way to connect to the XBee module to a serial port on your computer (using a USB "TTL" serial port, a "real" RS232 port has too high voltage).
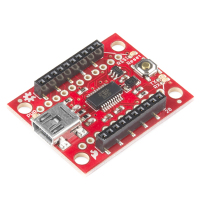
The easiest way is to use a dedicated board, like the SparkFun Explorer USB:
However, if you already have an Arduino and an XBee shield for it, you might want to use those to connect XCTU to your XBee module. In theory, this should be a matter of re-arranging some wires, but in practice I've run into some problems attempting this (depending on the hardware used).
In this post, I'll show a few ways to do this using an Arduino and a shield, and explain some of the problems you might run into.

My book about Arduino and XBee includes a chapter on battery power and sleeping. When I originally wrote it, it ended up over twice the number of pages originally planned for it, so I had to severely cut down the content. Among the content removed, was a large section talking about interrupts, sleeping and race conditions. Since I am not aware of any other online sources that cover this subject as thoroughly, I decided to publish this content as a blogpost separately, which is what you're looking at now.
In this blogpost, I will first explain interrupts and race conditions using a number of examples. Then sleeping is added into the mix, which again results in some interesting race conditions. All these examples have been written for Arduino boards using the AVR architecture, but the general concepts apply equally well to other platforms.
The basics of interrupts and sleeping on AVR are not covered in detail here. If you have no experience with this, I recommend these excellent articles on interrupts and on sleeping by Nick Gammon, which cover interrupts, sleeping and other powersaving in a lot of detail.
Yay! Last night (yes really night, it was 4:30 AM) I finalized and submitted the last chapter of my book. There's still a few details left, but the text of the book is out of my hands now, and the great folks at Packt publishing are now doing their magic with correcting my English, testing my code, layouting the book, and so on.
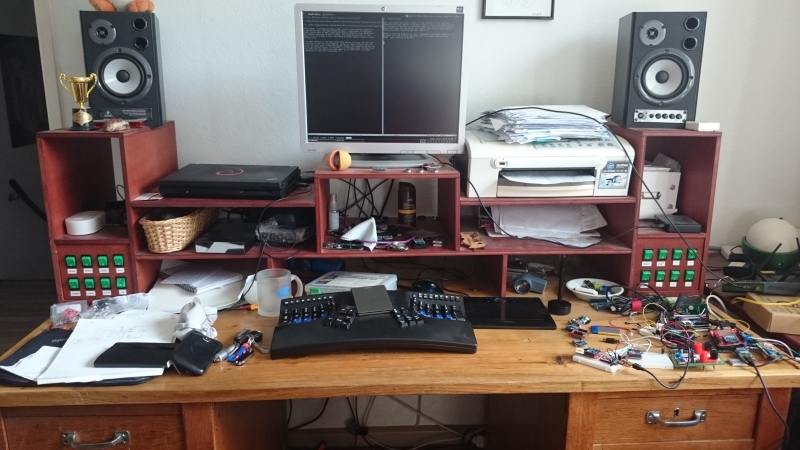
Great to have the pressure of these (repeatedly postponed) deadlines off my back, so I can finally take some time to do some long-due other stuff. Like cleaning up my desk:

Past summer, I've been writing a book, which is now nearing completion. A few months ago I was approached by Packt, a publisher of technical books, which want to add a book about sensor networks using Arduino and XBee modules to their lineup, and asked me to write it. The result will be a book titled "Building Wireless Sensor Networks Using Arduino".
I've been working on the book since then and am now busy with the last revisions on the text and examples. Turns out that writing a book is a lot more work than I had anticipated, though that might be partly due to my own perfectionism. In any case, I'll be happy when I'm done in a few weeks and can spend some time again on all the stuff I've been postponing in the last few months :-)


When working with an Arduino, you often want the serial console to stay open, for debugging. However, while you have the serial console open, uploading will not work (because the upload relies on the DTR pin going from high to low, which happens when opening up the serial port, but not if it's already open). The official IDE includes a serial console, which automatically closes when you start an upload (and once this pullrequest is merged, automatically reopens it again).
However, of course I'm not using the GUI serial console in the IDE, but minicom, a text-only serial console I can run inside my screen. Since the IDE (which I do use for compiling uploading, by calling it on the commandline using a Makefile - I still use vim for editing) does not know about my running minicom, uploading breaks.
I fixed this using some clever shell scripting and signal-passing. I
have an arduinoconsole script (that you can pass the port number to
open - pass 0 for /dev/ttyACM0) that opens up the serial console, and
when the console terminates, it is restarted when you press enter, or a
proper signal is received.
The other side of this is the Makefile I'm using, which kills the serial console before uploading and sends the restart signal after uploading. This means that usually the serial console is already open again before I switch to it (or, I can switch to it while still uploading and I'll know uploading is done because my serial console opens again).
For convenience, I pushed my scripts to a github repository, which makes it easy to keep them up-to-date too:

Last week, I got a fancy new JTAGICE3 programmer / debugger. I wanted to achieve two things in my Pinoccio work: Faster uploading of programs (Having 256k of flash space is nice, but flashing so much code through a 115200 baud serial connection is slow...) and doing in-circuit debugging (stepping through code and dumping variables should turn out easier than adding serial prints and re-uploading every time).
In any case, the JTAGICE3 device is well-supported by avrdude, the
opensource uploader for AVR boards. However, unlike devices like the
STK500 development board, the AVR dragon programmer/debugger and the
Arduino bootloader, which use an (emulated) serial port to communicate,
the JTAGICE3 uses a native USB protocol. The upside is that the data
transfer rate is higher, but the downside is that the kernel doesn't
know how to talk to the device, so it doesn't expose something like
/dev/ttyUSB0 as for the other devices.
avrdude solves this by using libusb, which can talk to USB devices
directly, through files in /dev/usb/. However, by default these device
files are writable only by root, since the kernel has no idea what kind
of devices they are and whom to give permissions.
To solve this, we'll have to configure the udev daemon to create the
files in /dev/usb with the right permissions. I created a file called
/etc/udev/rules.d/99-local-jtagice3.rules, containg just this line:
SUBSYSTEM=="usb", ATTRS{idVendor}=="03eb", ATTRS{idProduct}=="2110", GROUP="dialout"
This matches the JTAGICE3 specifically using it's USB vidpid (03eb:2110,
use lsusb to find the id of a given device) and changes the group for
the device file to dialout (which is also used for serial devices on
Debian Linux), but you might want to use another group (don't forget to
add your own user to that group and log in again, in any case).

While trying to track down a reset bug in the Pinoccio firmware, I
suspected something was going wrong in the dynamic memory management
(e.g., double free, or buffer overflow). For this, I wrote some code to
log all malloc, realloc and free calls, as wel as a python script
to analyze the output.
This didn't catch my bug, but perhaps it will be useful to someone else.
In addition to all function calls, it also logs the free memory after
the call and shows the return address (e.g. where the malloc is called
from) to help debugging.
It uses the linker's --wrap, which allows replacing arbitrary
functions with wrappers at link time. To use it with Arduino, you'll
have to modify platform.txt to change the linker options (I hope to
improve this on the Arduino side at some point, but right now this seems
to be the only way to do this).


