These are the ramblings of Matthijs Kooijman, concerning the software he hacks on, hobbies he has and occasionally his personal life.
Most content on this site is licensed under the WTFPL, version 2 (details).
Questions? Praise? Blame? Feel free to contact me.
My old blog (pre-2006) is also still available.
See also my Mastodon page.
| Sun | Mon | Tue | Wed | Thu | Fri | Sat |
|---|---|---|---|---|---|---|
| 1 | ||||||
| 2 | 3 | 4 | 5 | 6 | 7 | 8 |
| 9 | 10 | 11 | 12 | 13 | 14 | 15 |
| 16 | 17 | 18 | 19 | 20 | 21 | 22 |
| 23 | 24 | 25 | 26 | 27 | 28 | 29 |
| 30 | 31 |
(...), Arduino, AVR, BaRef, Blosxom, Book, Busy, C++, Charity, Debian, Electronics, Examination, Firefox, Flash, Framework, FreeBSD, Gnome, Hardware, Inter-Actief, IRC, JTAG, LARP, Layout, Linux, Madness, Mail, Math, MS-1013, Mutt, Nerd, Notebook, Optimization, Personal, Plugins, Protocol, QEMU, Random, Rant, Repair, S270, Sailing, Samba, Sanquin, Script, Sleep, Software, SSH, Study, Supermicro, Symbols, Tika, Travel, Trivia, USB, Windows, Work, X201, Xanthe, XBee
 &
&
(With plugins: config, extensionless, hide, tagging, Markdown, macros, breadcrumbs, calendar, directorybrowse, entries_index, feedback, flavourdir, include, interpolate_fancy, listplugins, menu, moreentries, pagetype, preview, seemore, storynum, storytitle, writeback_recent)
Valid XHTML 1.0 Strict & CSS
On a small embedded system, I wanted to run a simple Rails application and have it automatically start up at system boot. The system is running systemd, so a systemd service file seemed appropriate to start the rails service.
Normally, when you run the ruby-on-rails standalone server, it binds on port 3000. Binding on port 80 normally requires root (or a special capability enabled for all of ruby), but I don't want to run the rails server as root. AFAIU, normal deployments using something like Nginx to open port 80 and let it forward requests to the rails server, but I wanted a minimal setup, with just the rails server.
An elegant way to binding port 80 without running as root is to use systemd's socket activation feature. Using socket activation, systemd (running as root) opens up a network port before starting the daemon. It then starts the daemon, which inherits the open network socket file descriptor, with some environment variables to indicate this. Apart from allowing privileged ports without root, this has other advantages such as on-demand starting, easier parallel startup and seamless restarts and upgrades (none of which is really important for my usecase, but it is still nice :-p).

TL;DR: This post describes an easy way to add a power button to a raspberryp pi that:
- Only needs a button and wires, no other hardware components.
- Allows graceful shutdown and powerup.
- Only needs modification of config files and does not need a dedicated daemon to read GPIO pins.
There are two caveats:
- This shuts down in the same way as
shutdown -h noworhaltdoes. It does not completely cut the power (like some hardware add-ons do). - To allow powerup, the I²C SCL pin (aka GPIO3) must be used, conflicting with externally added I²C devices.
If you use Raspbian stretch 2017.08.16 or newer, all that is required is
to add a line to /boot/config.txt:
dtoverlay=gpio-shutdown,gpio_pin=3
Make sure to reboot after adding this line. If you need to use a
different gpio, or different settings, lookup gpio-shutdown in the
docs.
Then, if you connect a pushbutton between GPIO3 and GND (pin 5 and 6 on the 40-pin header), you can let your raspberry shutdown and startup using this button.
If you use an original Pi 1 B (non-plus) revision 1.0 (without mounting
holes), pin 5 will be GPIO1 instead of GPIO3 and you will need to
specify gpio_pin=1 instead. The newer revision 2.0 (with 2 mounting
holes in the board) and all other rpi models do have GPIO3 and work as
above.
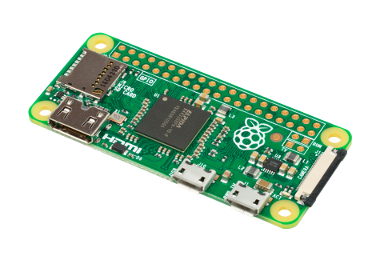
All this was tested on a Rpi Zero W, Rpi B (rev 1.0 and 2.0) and a Rpi B+.
If you have an older Raspbian version, or want to know how this works, read on below.

